Replacing the Needle: A Step-by-Step Guide for Vintage Record Players
One of the most common maintenance tasks for antique phonographs and vintage record players is replacing the needle, also known as the stylus. A worn or damaged needle significantly degrades sound quality, can damage your precious records, and can even harm the delicate cutting its unique its its to the unique its significantly to the overall the overall uniqueness a unique uniqueness its a uniqueness its unique uniqueness uniqueness the uniqueness uniqueness uniqueness significantly its uniqueness significantly uniqueness its uniqueness the the overall overall uniqueness overall uniqueness, the uniqueness its uniqueness contributes uniqueness uniqueness overall overall significantly uniqueness overall the uniqueness significantly uniqueness uniqueness overall the uniqueness overall uniqueness significantly uniqueness significantly what contributes significantly the uniqueness overall uniqueness its uniqueness overall uniqueness significantly its significantly uniqueness its uniqueness overall uniqueness overall the uniqueness its uniqueness its the uniqueness uniqueness overall uniqueness contributes uniqueness significantly its uniqueness overall uniqueness its uniqueness what uniqueness a unique uniqueness significantly uniqueness its uniqueness what differentiates uniqueness its uniqueness contributes uniqueness its uniqueness overall what differentiates its the uniqueness its uniqueness the uniqueness differentiates its uniqueness what differentiates uniqueness the overall overall uniqueness overall uniqueness differentiates uniqueness differentiates what differentiates the the the what differentiates uniqueness uniqueness what differentiates the overall differentiates uniqueness differentiates uniqueness differentiates what differentiates contributes uniqueness differentiates the overall uniqueness the uniqueness what differentiates what differentiates the uniqueness what differentiates uniqueness what differentiates uniqueness the uniqueness what differentiates what differentiates the the uniqueness uniqueness differentiates uniqueness overall uniqueness the uniqueness the uniqueness the overall uniqueness what the what differentiates uniqueness contributes what differentiates the uniqueness the overall what its uniqueness its uniqueness creates overall unique creates what creates the overall uniqueness its uniqueness creates overall uniqueness what differentiates the overall the uniqueness overall what creates uniqueness creates its overall uniqueness creates uniqueness what its overall uniqueness uniqueness what differentiate creates overall uniqueness what creates the overall uniqueness what creates the uniqueness what creates the overall experience creates uniqueness differentiates its overall uniqueness its uniqueness creates overall uniqueness the overall uniqueness what differentiate the overall overall what differentiates overall impression uniqueness its what what overall overall impression overall the overall uniqueness uniqueness creates an uniqueness overall overall impression what creates the what differentiates overall creates impression overall experience what impression overall overall experience creates its overall experience creates what distinguishes what differentiates overall impression what impression what differentiates overall uniqueness its overall its overall what differentiates its uniqueness what contributes unique its overall impression what its uniqueness creates overall experience unique its unique differentiates what contributes overall impression creates a unique its overall what creates overall impression overall impression its unique distinguishes its what differentiates overall uniqueness overall uniqueness what impression what a unique its overall its uniqueness what distinguishes creates an creates impression creates overall experience.
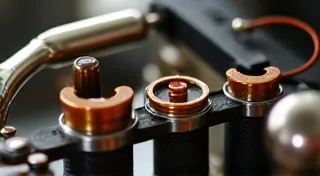
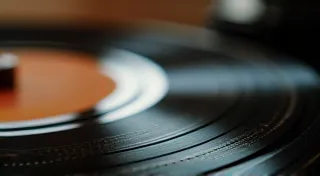
Understanding Phonograph Needles & Compatibility
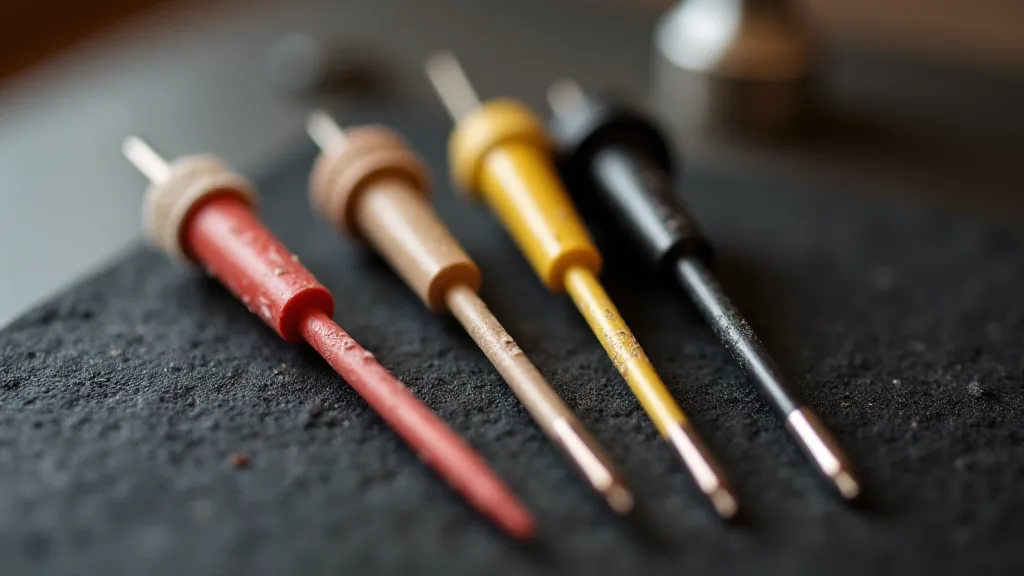
Not all needles are created equal. Finding the correct needle for your specific phonograph model is crucial. Needles come in various shapes, sizes, and mounting styles. Here's a brief overview:
- Conical Needles: These are the most common and generally older style. They are relatively inexpensive but provide less detail retrieval compared to more modern shapes.
- Spherical Needles: Similar to conical, but often slightly smaller.
- Elliptical Needles: These provide improved tracking and detail compared to conical or spherical needles, but are more susceptible to damage if incorrectly installed or used with excessively worn records.
- Shibata Needles: A more advanced elliptical shape, offering superior sound reproduction.
Determining the Correct Needle: The best way to find the right needle is to consult your phonograph’s owner’s manual. If the manual is unavailable, you can often find the correct needle type listed online by searching for your phonograph model number. Reputable needle suppliers often have online catalogs that allow you to search by model. Never assume a needle will fit; incorrect sizes or shapes can damage your equipment. Troubleshooting issues with older phonographs can be a complex process, and sometimes understanding the underlying mechanism, as described in articles like Understanding the Edison Standard Phonograph Mechanism, can prove invaluable. Knowing how these early devices functioned sheds light on potential needle compatibility issues.
Tools You'll Need
- New Phonograph Needle: The correct type for your model.
- Good Lighting: Working in a well-lit area is essential.
- Magnifying Glass (Optional): For inspecting the old needle and the mounting area.
- Small Pliers or Tweezers (Optional): Some needles require a little help to secure properly. Use with extreme caution!
Step-by-Step Needle Replacement
- Power Off: Always disconnect your phonograph from the power outlet before performing any maintenance.
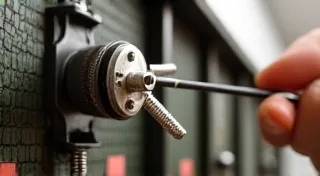
- Locate the Needle Assembly: The needle is typically housed within a small assembly attached to the tone arm. The specific design varies greatly by model.
- Release the Old Needle: This is often the trickiest part. Many older phonographs have a simple clip or lever that secures the needle. Others require a more subtle release mechanism. Carefully examine the area and gently probe with your finger or a small tool to identify the release mechanism. Avoid forcing anything! Consult your phonograph’s service manual if available.
- Remove the Old Needle: Once the release mechanism is triggered, the old needle should slide out or detach easily.
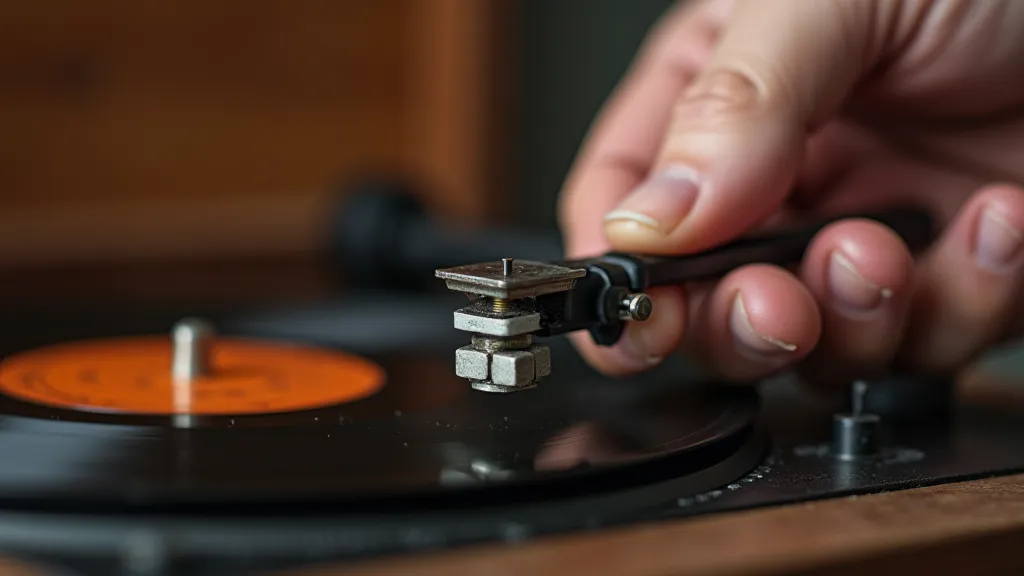
- Install the New Needle: Align the new needle with the mounting points and gently slide it into place. Ensure it is securely seated.
- Secure the Needle: Depending on the model, this may involve snapping a clip into place or tightening a small screw.
- Test the Installation: Carefully reconnect the phonograph to the power outlet and test the sound quality. Ensure the needle is tracking properly and producing clear sound.
Beyond the simple replacement process, the intricacies of vintage phonographs, especially when it comes to electrical components, can be daunting. If you're experiencing persistent issues beyond just a bad needle, investigating common electrical problems, as outlined in Common Electrical Problems in Antique Phonographs: A Beginner's Guide, may be the next step.
Important Tips & Cautions
- Handle Needles with Care: Phonograph needles are delicate and can easily be damaged by fingerprints or rough handling.
- Avoid Over-Tightening: If your phonograph uses a screw to secure the needle, do not over-tighten it, as this can damage the needle or the mounting assembly.
- Listen for Skipping: If the needle is skipping or mistracking, it may be the wrong type or incorrectly installed.
- Regular Inspection: Regularly inspect your needle for wear and tear. Replace it as needed to maintain optimal sound quality and protect your records.
- Consult a Professional: If you are unsure about any step of the process, or if you encounter any difficulties, consult a qualified phonograph repair technician.
- Field Coil Restoration: For those wanting to restore a phonograph to its original glory, often the field coils require attention. Techniques for restoring these coils, which contribute significantly to the overall sound, can be found in Restoring Phonograph Field Coils: Techniques for Optimal Sound and Performance.

Vintage phonographs, with their intricate designs and delicate mechanisms, present a unique restoration challenge. Proper maintenance goes beyond simply replacing the needle; it's about understanding the entire system. The complexity of these machines can lead to various noises and imperfections in playback. If persistent noise remains after a needle replacement, Troubleshooting a Noisy Phonograph: Common Causes and Fixes offers further guidance to pinpoint and address the source of the problem.
Replacing your phonograph needle is a relatively simple process that can significantly improve the performance and longevity of your vintage audio equipment. With a little care and attention to detail, you can keep your cherished phonograph playing beautifully for years to come.